
CAMERA SETUP GUIDE

USB POWER REQUIREMENTS
In order to make the H7/H5 SLIM as thin and light as possible the battery has been removed. Your camera must be operated using USB-C power only. A USB power supply with a minimum of 5V 1A is required to operate the camera, however we strongly recommend using a USB power supply with 5V 2.1A or higher for reliable operation.
USING THE CAMERA FOR THE FIRST TIME
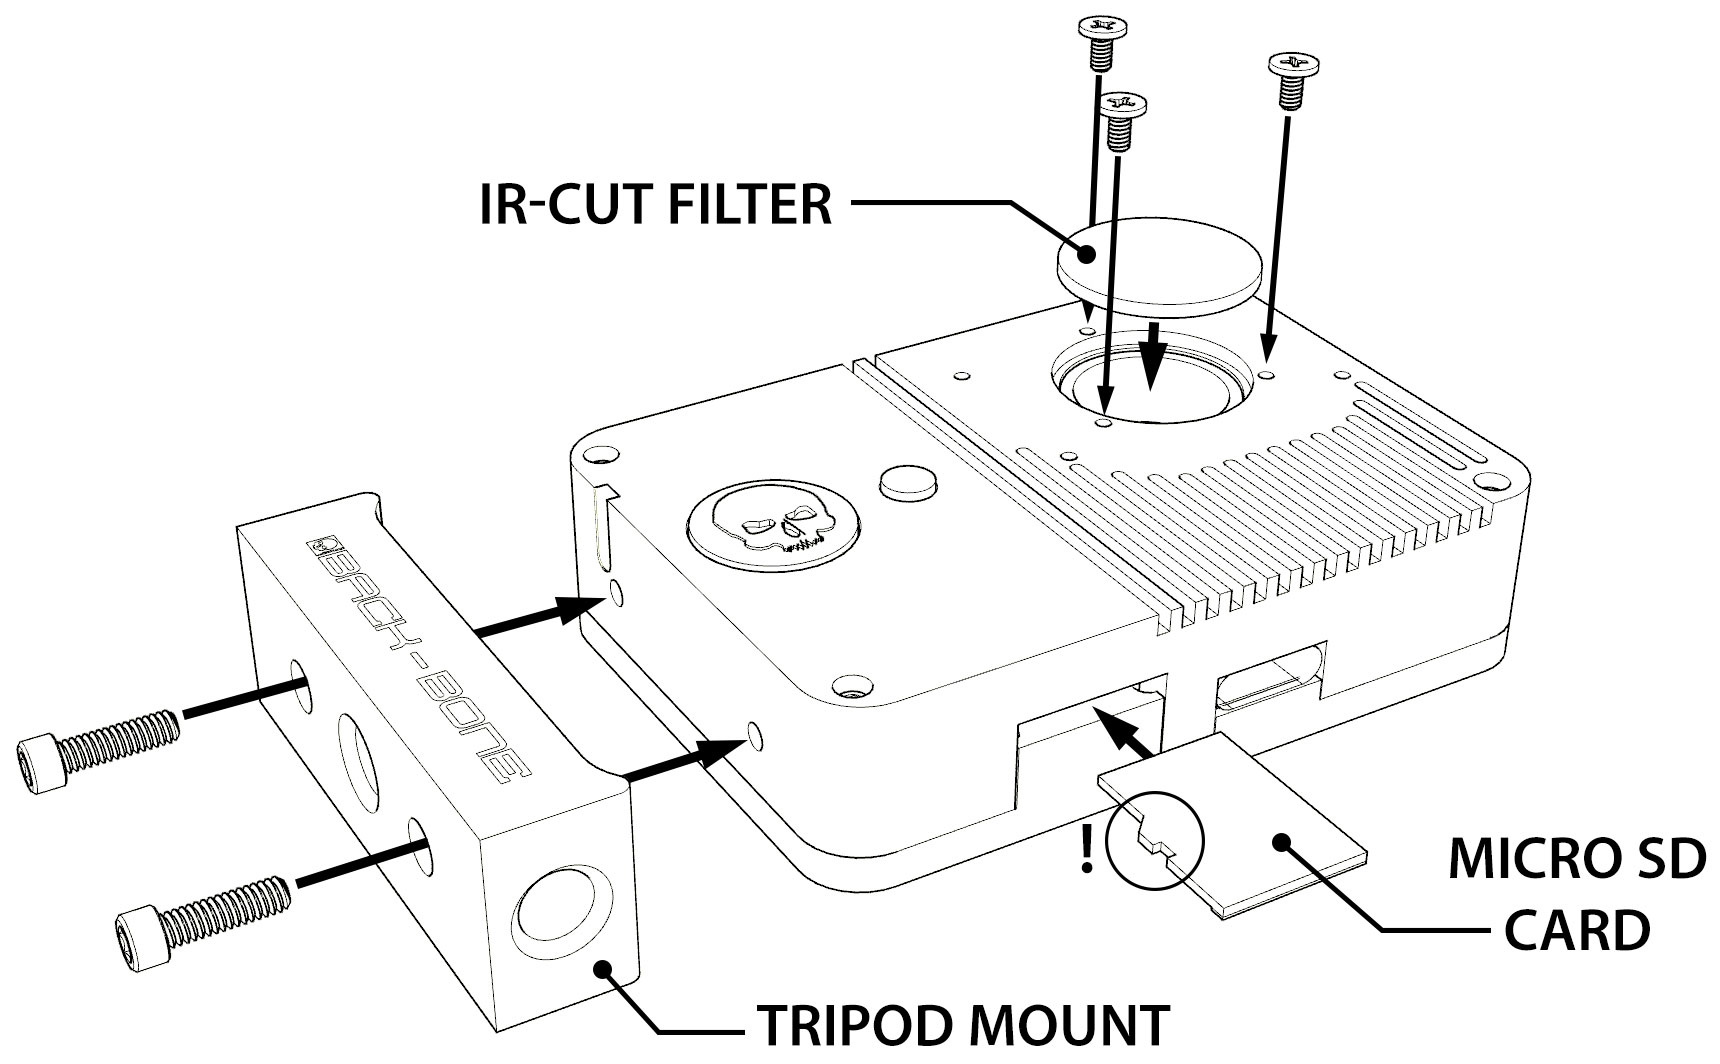
Your camera ships with an M12 extension tube and plastic cap screwed into the lens socket to keep the image sensor clean and protected. Simply unscrew to remove. The extension tube can be used with some M12 lenses but in most cases is not required. If you don’t wish to use the included tripod mount it can easily be removed and re-attached using the large Allen key supplied.
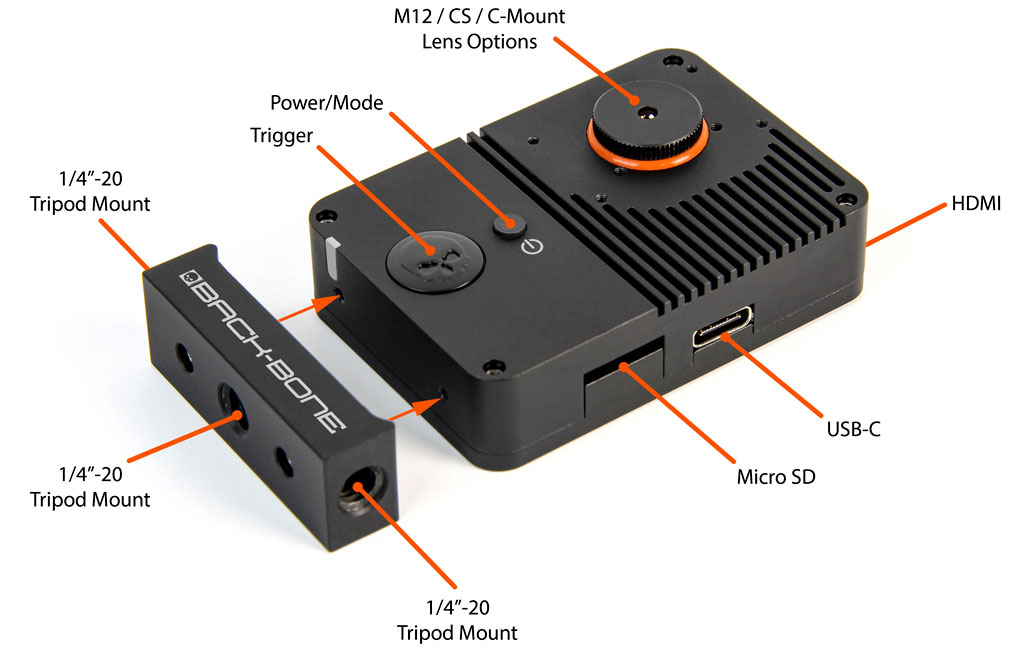
MOUNTING M12 LENSES
- Remove the camera’s IR-Cut filter if present
- A locking ring or rubber O-ring can be used to fix the lens in place (blue bag).
- Low profile M12 lenses and lenses with a short back focus distance can be used directly in the camera’s lens socket.
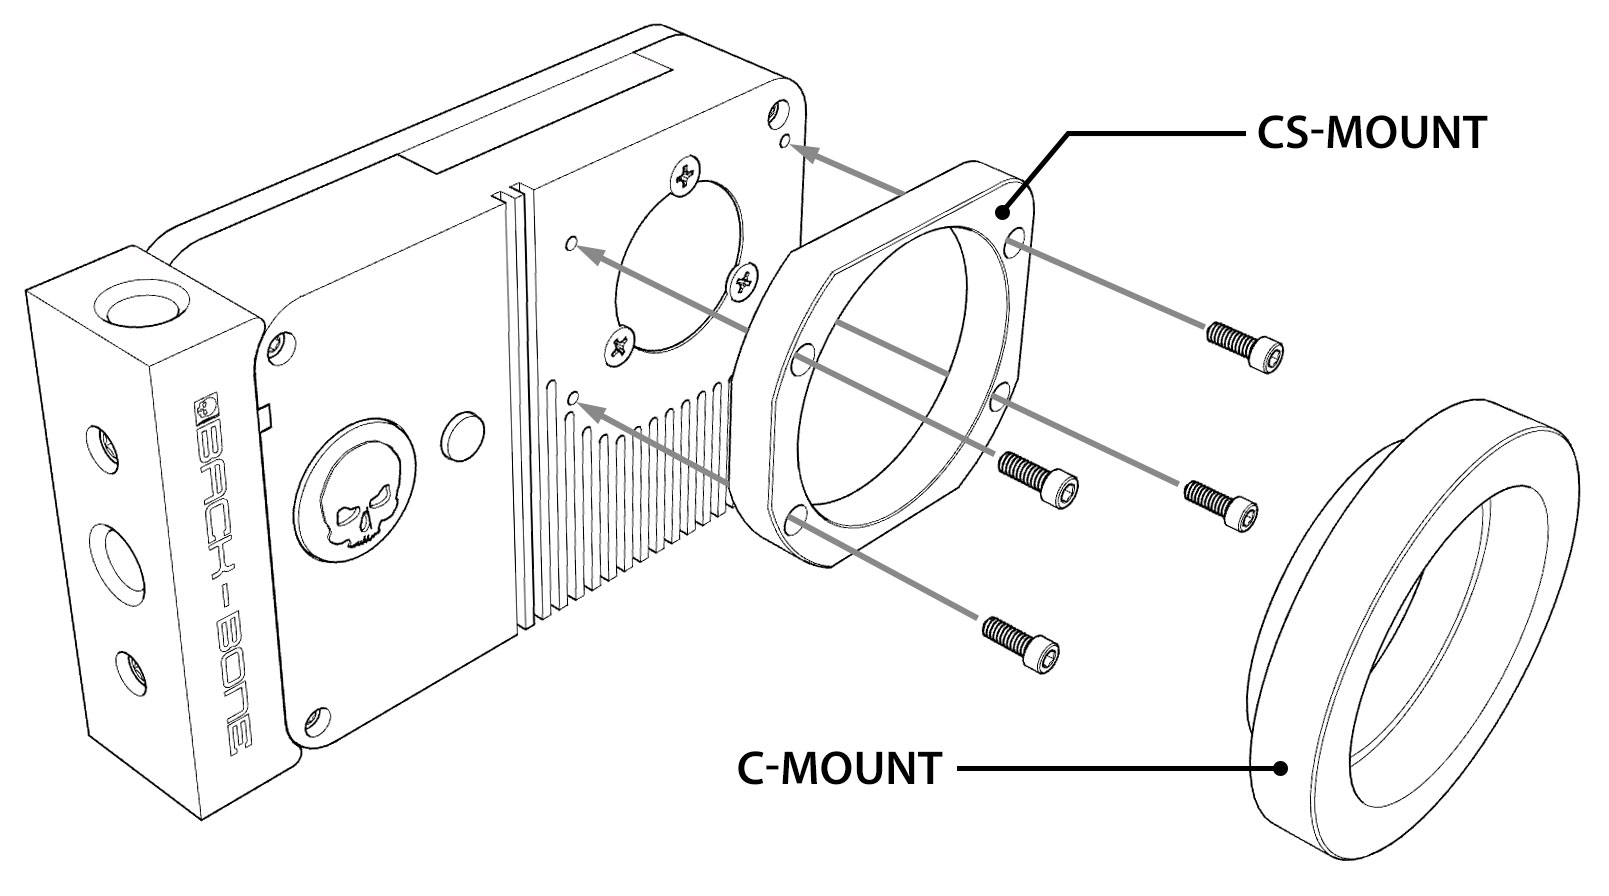
- M12 lenses that need to be farther from the sensor can be used with the included adapter. You must first screw the ‘CS-Mount’ ring to the camera using the included screws & L-Key.
- Screw the M12 to CS adapter ring onto the camera (Yellow Bag).
- Thread your lens into the adapter until sharply in focus.
- We recommend using an external monitor to set the focus of the lens.
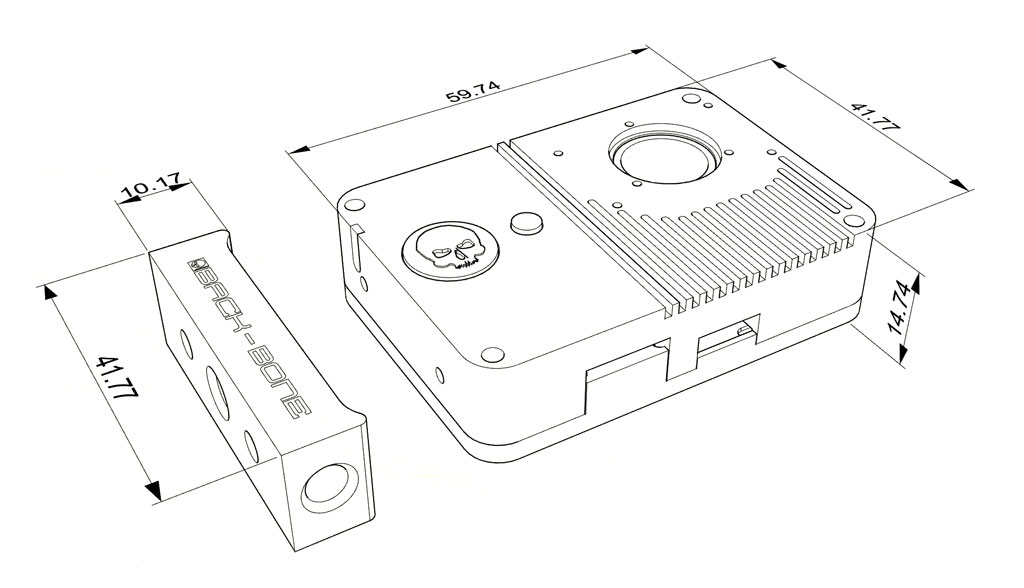
Weights and Dimensions (mm)
Camera body – 60g
Tripod mount – 14g
CS-Mount ring – 4g
C-Mount ring – 5g
Support
Got a question about your project? Get up and running with our help! Take a look at our Troubleshooting Guide or FAQ for some solutions to common problems, if the answer isn’t there drop us a line.
For more help with our product please visit www.back-bone.ca/support or email us
support@back-bone.ca
USING THE INCLUDED LENSES
- To us the short 7.5mm lens simply add the orange ring to the lens and thread it directly into the camera’s lens socket until very snug and sharply in focus.
- To use the original GoPro lens the CS-Mount ring must first be installed. The original lens comes threaded into a special adapter. Please note that the GoPro lens adapter has different threads and won’t work with standard M12 lenses. The adapter has writing on the backside to identify it.
INSTALLING THE IR-CUT FILTER
Your camera does not have an IR-Cut filter installed as it’s designed to be used primarily with M12 lenses which usually have the filter built in. The IR-Cut filter blocks infrared light so that your images have normal color and is recommended for use with CS, C-Mount and most other lens types. Filters are located in the red baggie supplied inside the camera case. Replacement filters are available in the accessories section of our shop.
- Remove the IR-Cut filter from its protective packaging, take care to handle it by the edges.
- Drop the filter into the socket on the front of the camera
- Use the three short silver screws and a Philips #00 screwdriver to hold the filter in place.
CS-MOUNT & C-MOUNT LENSES
- The CS-Mount ring must be connected to the camera using the included screws and L-Key.
- For normal color make sure the IR-Cut filter is installed.
- For C-Mount lenses add the 5mm spacer ring, for CS-Mount lenses remove it
- Focus the lens as desired using the rear display or an external HDMI monitor
USING LENS ADAPTERS
If using C-Mount adapters to mount other lens types on your camera, make sure the 5mm C-Mount spacer is attached and the IR-Cut filter is installed. Visit www.back-bone.ca/shop for a wide selection of lens adapters.
TIPS
- If your lens feels a little loose inside the camera, try wrapping a layer of Teflon tape around it. That will ensure a snug fit so that the lens is perfectly aligned with the image sensor. Teflon tape is cheap and readily available in the plumbing section of any hardware store.
- Keep an air puffer and microfiber cleaning cloth in your shooting kit so you can blow debris out of the camera if needed and keep your lenses crystal clean.
- If you have a 4K TV switch your camera to 4K while focusing for the sharpest image.
Troubleshooting:
My camera turns off after just a few seconds! Use the small button to power on the camera instead of the larger one. Quick capture is triggered by default when you hit the large button so it will try and record. If no SD card is found it will simply turn off. Read the Hero5 manual for more information.
My footage looks pink! Most M12 lenses have a small pink/green filter on the back called an IR-Cut which prevents infrared light from reaching the sensor. If your footage looks pink this filter is likely missing, or you are using an ‘IR corrected’ lens which is designed for full spectrum & IR imaging.
I can’t connect to the camera using the GoPro App: As described on the product page, the WiFi/GPS module has been removed from the camera in order to make it as small as possible. Therefor the app and wireless remote will not function.
Dark spots in footage: Your image sensor needs to be cleaned. Using an air puffer is usually enough to blow away any small particles that might have gotten on the sensor. A LensPen MiniPro is also a great tool for cleaning the small GoPro sensor. Also verify that there is no dust or debris on the back of the lens.
Images are blurry on one side: Likely your lens is not perfectly aligned with the image sensor. Some lenses have looser thread engagement than others which may cause a slight tilt. Try adding a layer of Teflon tape to the lens barrel as outlined in the tips.
When I shoot footage for 360 video, the image circle keeps moving around: When shooting content from circular fisheye lenses for stitching in 360 video software, make sure the image stabilization feature is turned off.