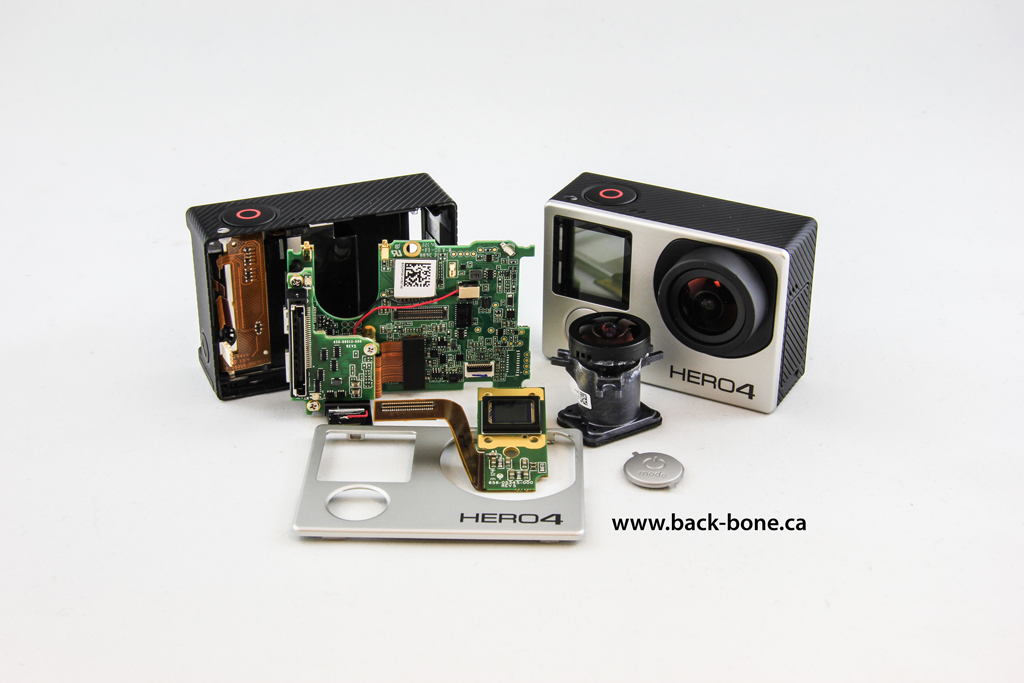
Now that we’re deep into our new round of development on the latest Ribcage Mod, we thought we’d share our experience so far starting with the Hero4 Silver. We’ve pulled it apart so you can see what’s new. It appears to be very similar to the Hero3+ Black with the same sensor and almost identical shooting features. It does of course have some great new additions, in particular the built in screen that’s brighter and clearer than the Hero3 BacPac. If you’re wondering: Yes you can attach the Hero3 LCD BacPac on top of the built in screen and it does work. It even gives the older screen the swiping menu actions that the new one has. Now lets see what’s inside!
What follows should not be considered instructions. New modification instructions will be available once the new Ribcage Mod Kit for Hero4 is released.
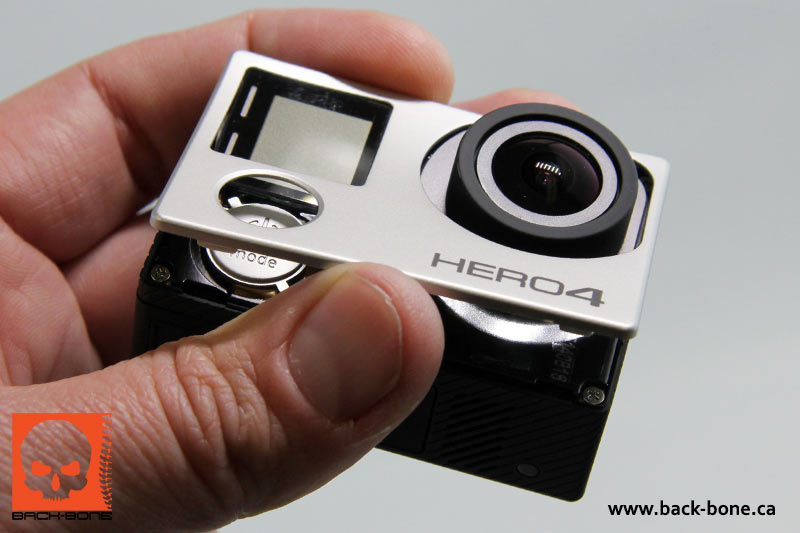
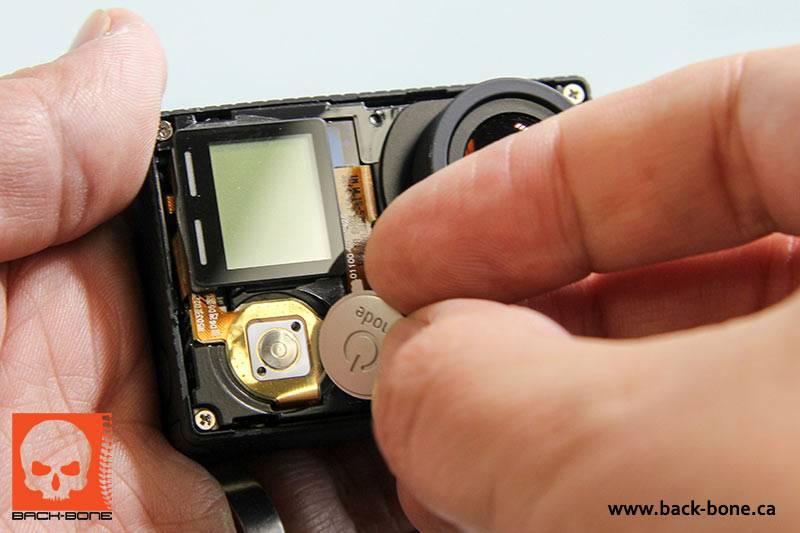
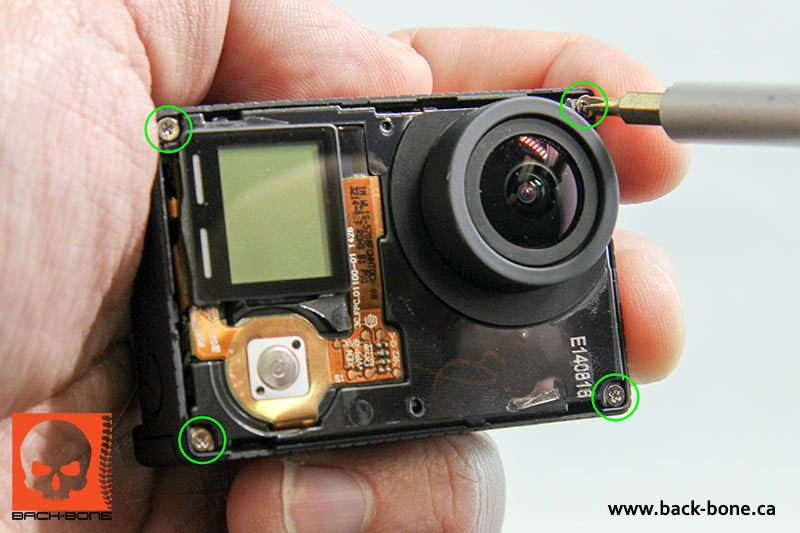
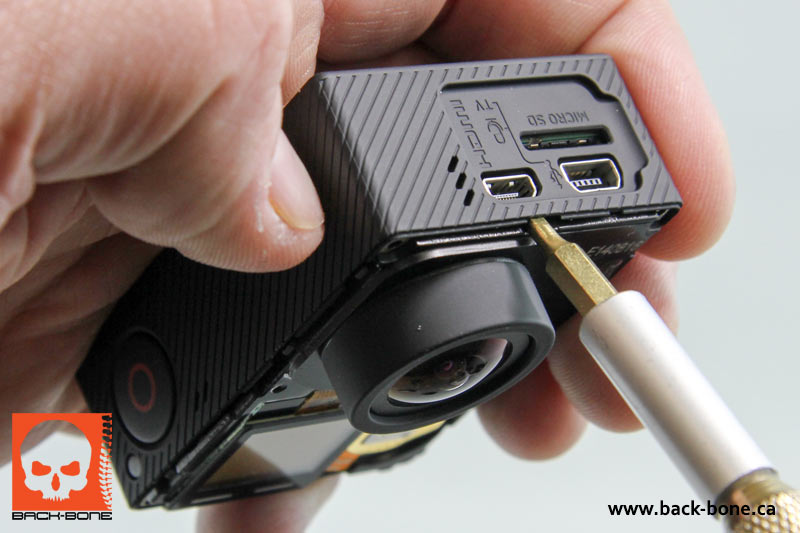
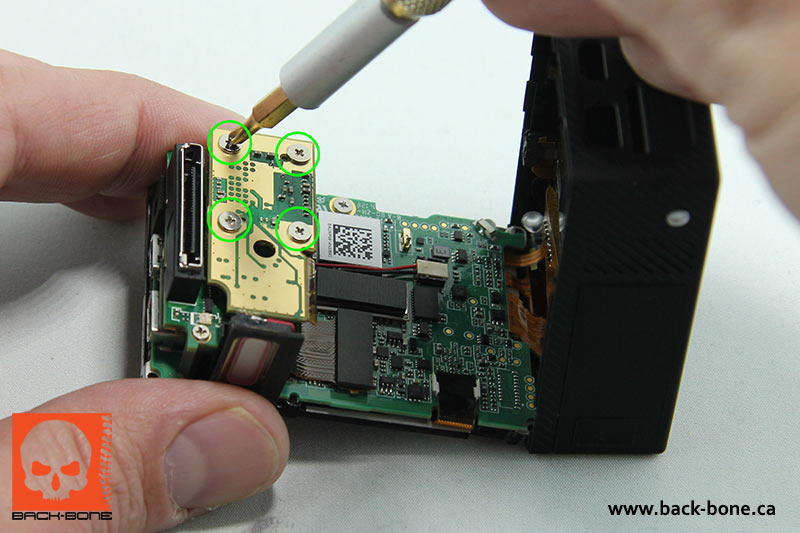
As before the faceplate is held on with a series of tabs and some adhesive tape.This time around we find it a little easier to start pulling it up from the bottom rather than the top left. The faceplate comes off easily when you work your way around.In this version of the camera the power/mode button is on its own. In the Hero3 cameras it was attached to the faceplate. It’s much easier to remove now.Next we remove the screws that hold the assembly into the camera body. The lower left hand screw is shorter than before.As with the Hero3 there’s a small groove above the HDMI and USB ports that allows you to pop the housing up slightly with a small screw driver.
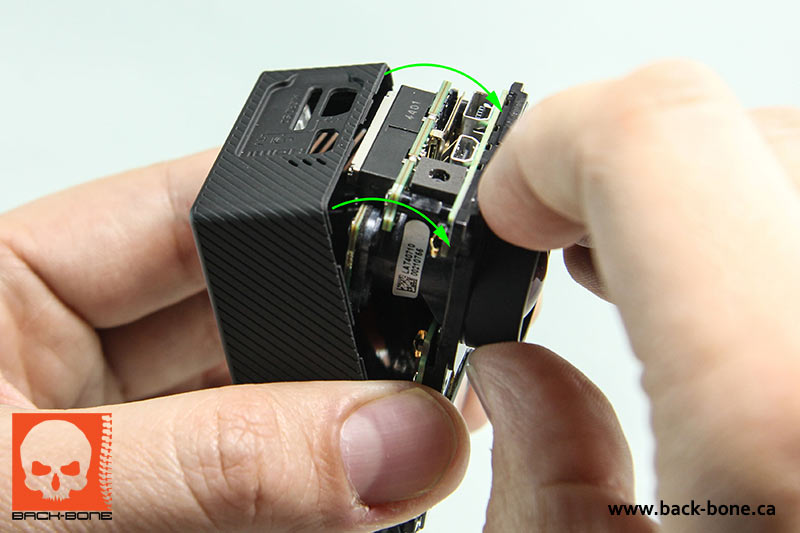
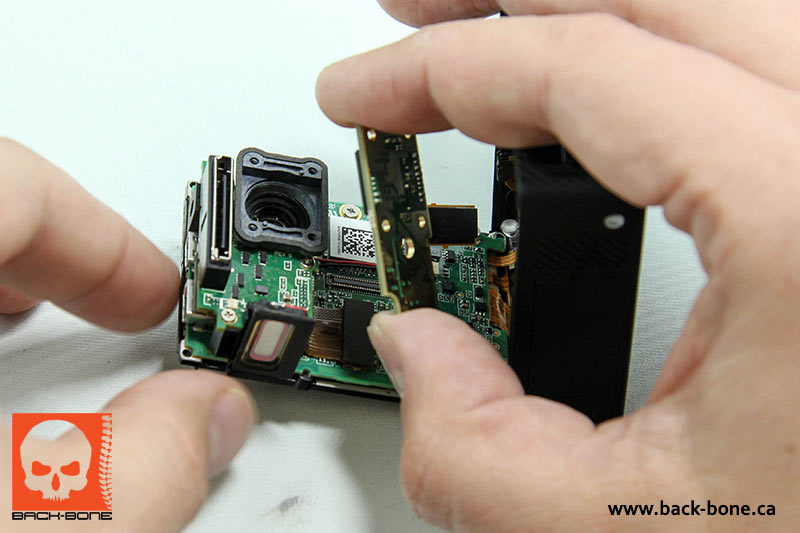
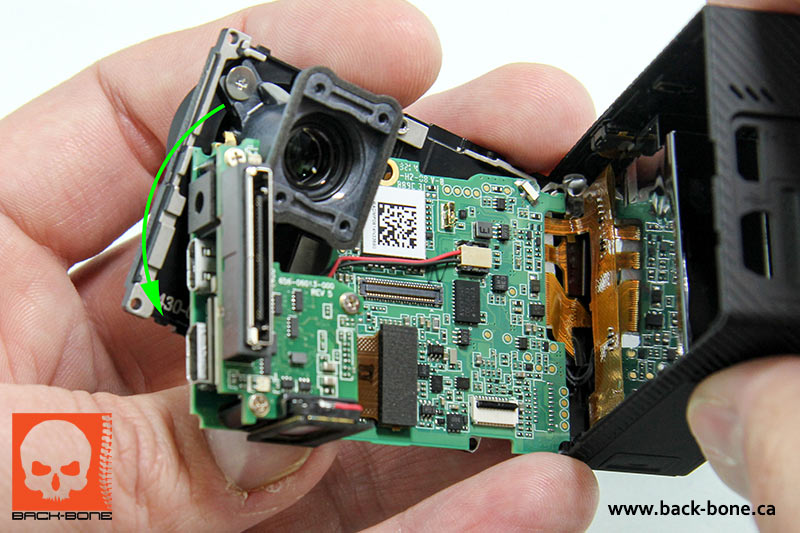
Once you’ve got the ports free from the housing you can wiggle the assembly free by gripping the lens. The assembly should hinge open as pictured.There are a series of ribbons that attach to the new screen which must be disconnected later.
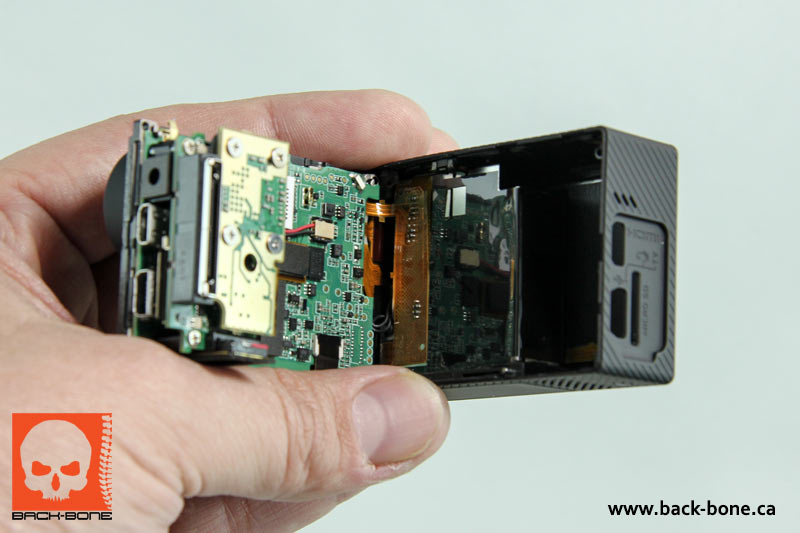
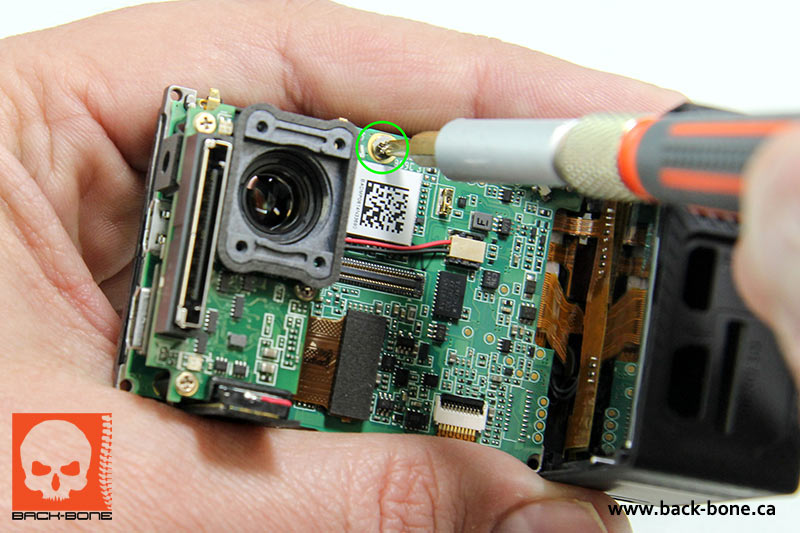
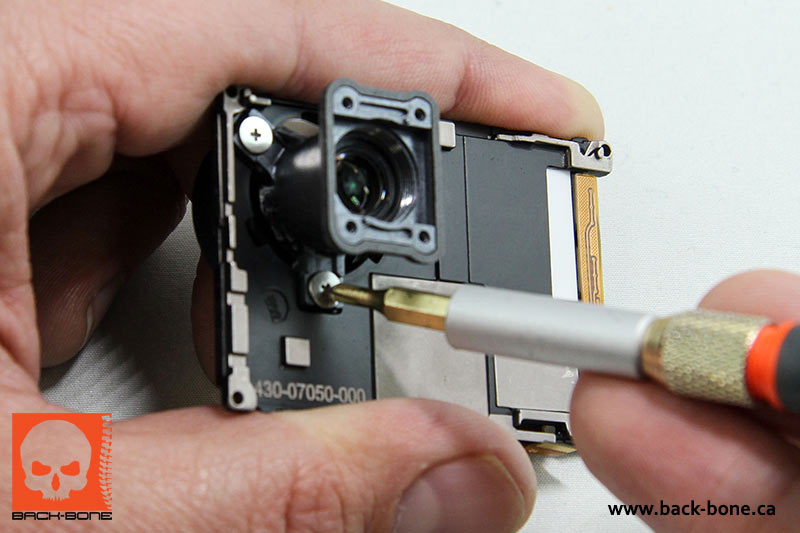
Next we disconnect the image sensor by removing the four screws on the back.A gentle tug releases the image sensor connector from the main board.
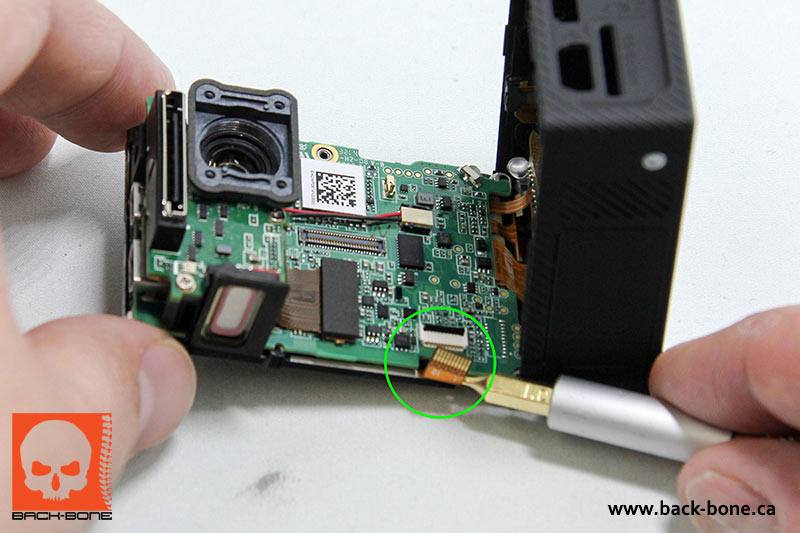
We remove the screw holding the main board to the aluminum frame.Next we need to release the front LCD/button ribbon from the board by pulling off the black tape, pulling up on the black locking tab and gently tugging the ribbon free.Now that it’s detached we can angle the main board out from around the lens assembly.
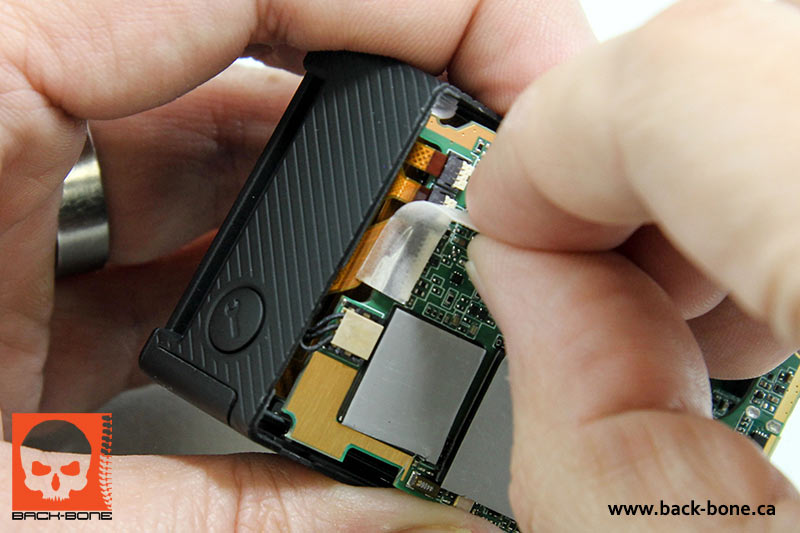
Now we can fold the board back over into the housing again to access the ribbon connections on the back. They are covered in some light tape, which must be removed.
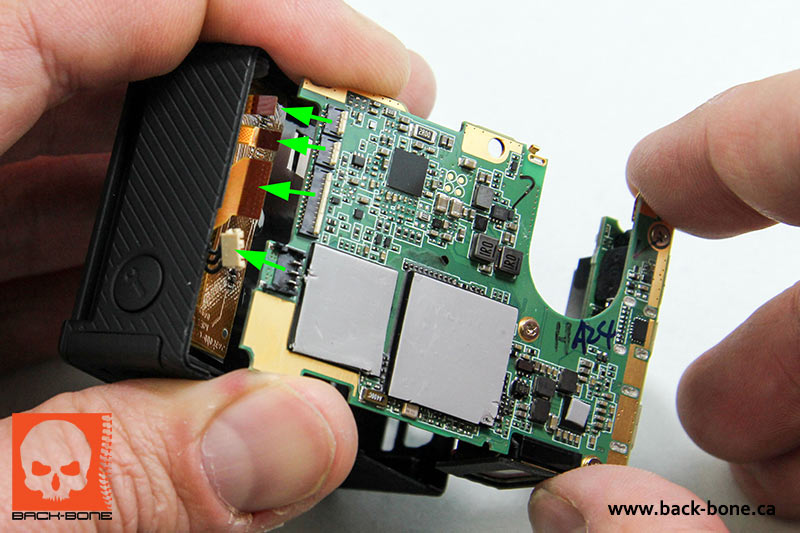
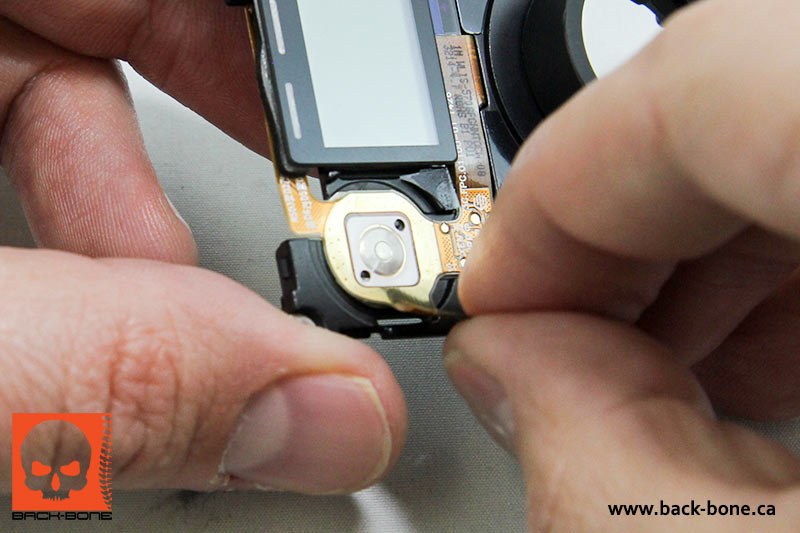
Now we flip up the three locking tabs to free the ribbons and pull up on the white connector to free it from the board.
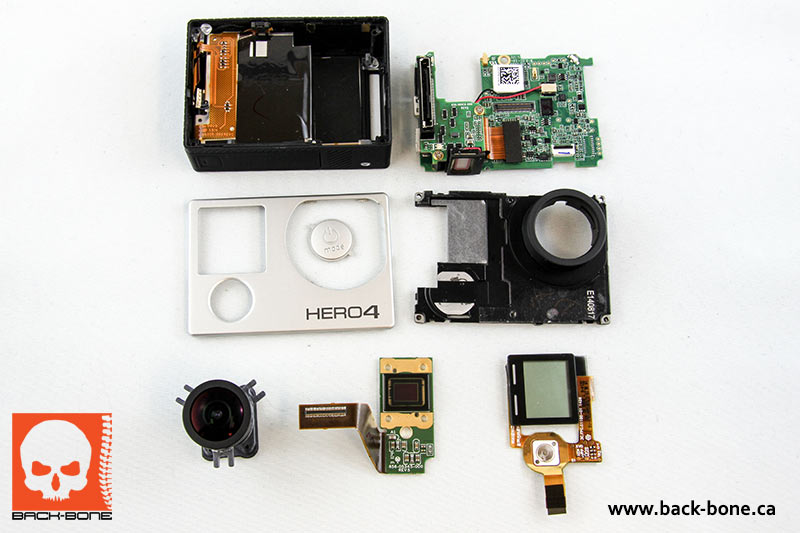
The main board is now free from the housing. We can now take the aluminum frame and remove the lens.Lastly we’ll remove the LCD button strip. Like in the previous model it’s held down with some sticky adhesive so it must be peeled off slowly and carefully. The entire LCD is stuck down in this version. In our initial tests we didn’t want to force the screen off, so we propped up the aluminum frame off the surface of the desk and placed some soft foam underneath. We added a small weight to the exposed rear of the screen and the constant small pressure from the weight cased the screen to drop off after about half an hour. We are currently working on a much faster method for this step.
So there you have it. As before it’s really not that hard if you take your time. In our next post we’ll highlight some of the physical differences between the Hero3 Black and the Hero4 Silver.