
QUICKSTART GUIDE

Screws & L-Keys
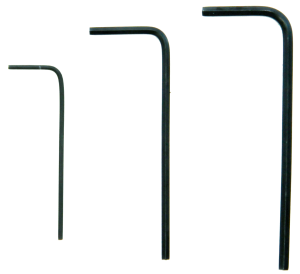
A large L-Key is provided with the Sidearm tripod mount. The Ripcord sensor housing screw pack comes with medium and small sized L-Keys. The medium L-Key is for all of the housing screws. The small one works with the set screw located on the underside of the M12 lens mount.
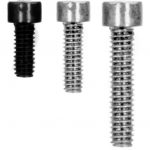
One long silver screw is provided for the Sidearm tripod mount. The remaining silver screws are for attaching the CS-Mount ring and the option rear plate for the sensor housing. The black screws are for the tripod mount and the M12 lens mount.
Install / Remove the IR-Cut Filter
The Ripcord camera comes configured as an M12 mount without the IR-Cut filter in place. Most M12 lenses have an integrated IR-Cut filter but it might need to be installed in some cases. The IR-Cut filter blocks infrared light so that your images have normal color and is recommended for use with CS, C-Mount and most other lens types.
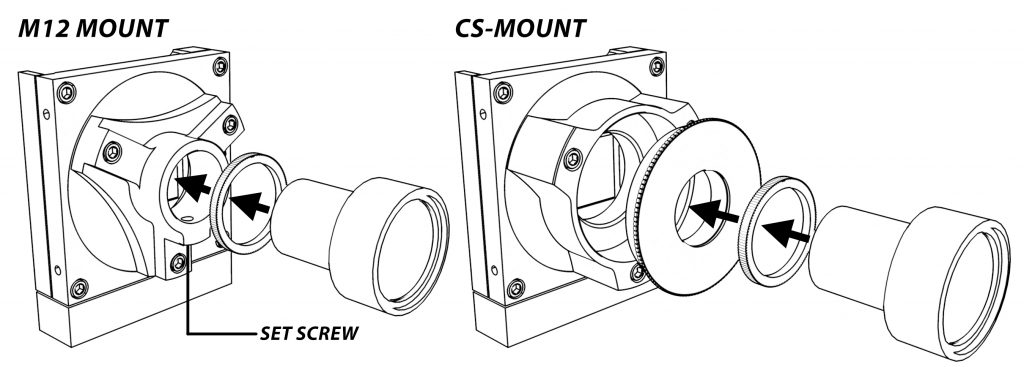
M12-Mount
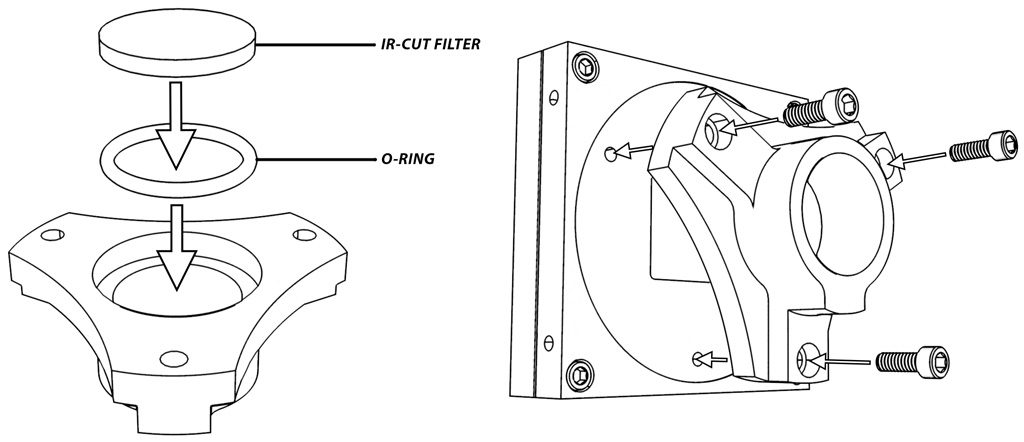
- Remove the M12 mount from the sensor housing using the large L-Key.
- Insert a rubber O-Ring into the socket on the rear of the M12 mount.
- Take one of the supplied IR-Cut filters out of its sleeve. Handle it by the edges to keep it clean. Drop it into the socket on top of the O-Ring.
- Move the sensor housing into place down onto the M12 mount and re-attach using the large L-Key.
- To remove the filter, remove the M12 mount and drop the filter back into its supplied envelope.
CS/C-Mount
- Remove the M12 mount from the sensor housing using the large L-Key.
- Connect the included CS-Mount using the long silver screws provided.
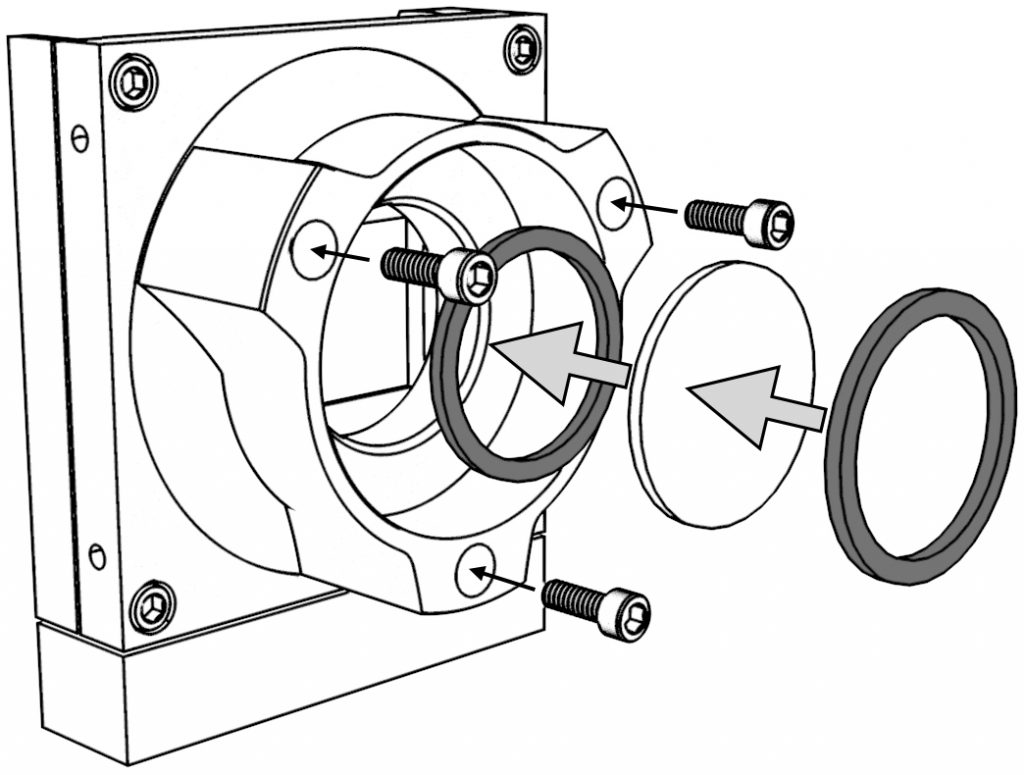
- Insert a rubber O-Ring into the socket on the front and push it all the way to the bottom using the supplied black plastic spudger tool (located in package lid).
- Take one of the supplied IR-Cut filters out of its sleeve. Handle it by the edges to keep it clean. Drop it into the socket on top of the O-Ring.
- Add a second O-Ring on top of the filter to hold it in place. Use the included plastic spudger tool if required.
- To remove the filter, use the pointy end of the supplied plastic spudger tool to pop out the O-Ring on top. Drop the filter back into its supplied envelope.
Adding CS & C-Mount Lenses
- For normal color make sure the IR-Cut filter is installed.
- Replace the M12 mount with the CS-Mount supplied.
- For C-Mount lenses add the 5mm spacer ring, for CS-Mount lenses remove it.
- Focus the lens as desired using the rear display or an external HDMI monitor.
Using Lens Adapters
Changing the Tripod Mount Orientation
Support
Got a question about your project? Get up and running with our help! Take a look at our Troubleshooting Guide or FAQ for some solutions to common problems, if the answer isn’t there drop us a line.
For more help with our product please visit www.back-bone.ca/support or email us
support@back-bone.ca
Mounting M12 Lenses
Your camera comes with a dedicated M12 mount installed, however you can also use the included CS-Mount + M12 to CS adapter if needed. The original GoPro lens is also included with a special CS-Mount adapter. Please Note: Do not use any other lenses with the GoPro lens adapter or you may damage the threads. The GoPro lens adapter has text on the backside that identifies it. The GoPro lens will not thread into a standard M12 socket.
- Remove the C-Mount ring and IR-cut filter if present.
- (CS-Mount only) Screw the M12 to CS adapter ring onto the camera (yellow baggie)
- Add the small black locking ring to your lens.
- Screw the lens into the adapter until sharply in focus.
- Tighten the locking ring against the camera to lock the lens in place.
- The dedicated M12 mount also has a nylon tipped set screw that can be tightened with the smallest L-Key to fix the lens in place once focused.
Focusing Entaniya 220°, 250° and 280° Lenses
Entaniya lenses can be installed using the Ripcord M12 mounts, however we recommend using the included CS-Mount with Entaniya’s lens mount for the most secure setup. If the 5mm C-Mount ring is on the camera, remove it. Also, remove the IR-Cut filter if present. Add 4 or 5 of the set screws to the outside of the red mounting ring supplied with your lens. The black mounting ring that comes with the lens is for Hero4 Ribcage mods and is not required. Screw the red mount onto the camera until snug. Add a layer of Teflon tape to the barrel of the lens and thread it into the orange mount. We recommend attaching your camera to a high-res HDMI screen to set your focus. Once the image is perfectly sharp fix the lens in place by tightening the set screws around the perimeter.
The video below shows the process using one of our H5PRO cameras which has a similar CS-Mount / C-Mount configuration.
Changing the Ribbon Orientation with the Optional Back Plate
A thin aluminum back plate is included in your camera package. This is so you can bend the ribbon 90 degrees allowing it to come out the left, right or bottom of the sensor housing. Once the ribbon has been folded, use the long set of silver screws to replace the ones in the corners of the housing one at a time. Hold the plate tight against the back as you tighten the screws to ensure a snug fit. Note: It is not recommended to fold the ribbon more than once.
TIPS
-
If your M12 lens feels a little loose inside the adapter, try wrapping a layer of Teflon tape around it. That will ensure a snug fit so that the lens is perfectly aligned with the image sensor. Teflon tape is cheap and readily available in the plumbing section of any hardware store.
-
Keep an air puffer and microfiber cleaning cloth in your shooting kit so you can blow debris out of the camera if needed and keep your lenses crystal clean.
-
If you have a 4K TV switch your camera to 4K while focusing for the sharpest image.